Showing posts with label screen. Show all posts
Showing posts with label screen. Show all posts
Friday, October 14, 2016
Print Screen Button Tips
Print Screen Button Tips
Each and every computer users are familiar with the Print Screen Button. Most of you know, you can take a picture of your screen through Print Screen button. In your Keyboard, you may notice the button as this name - Prt Sc/SysRq.
Do you know what is SysRq? Its an acronym for System Requirement which is a command used by Linux Kernel. To be honest, I know nothing about the use of SysRq. And in a Windows PC, this button has no standard use.
Using the Print Screen Button Smartly
Almost all of you can use the Print Screen button. But how many of you can use this button smartly? Not many people! :)
Print Screen
If you press this button, the picture of your screen will be sent to clipboard. Then you can paste the image in a program that allows you to paste images. Such as - Paint, Photoshop, MS Word etc.
Example - I pressed the Print Screen button and paste the image in Photoshop. Now you can see the picture of the whole screen including task bar.
Alt + Print Screen
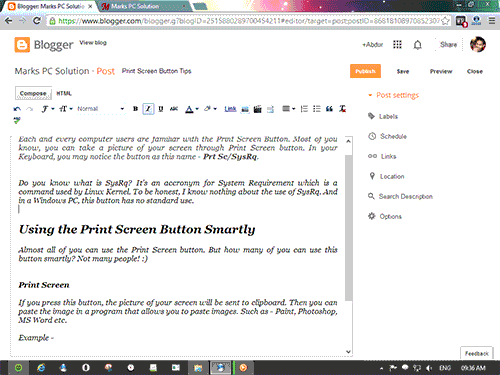
Suppose you dont need the whole screen. You just need the picture of your currently running screen or program. In that case, you can press Alt + Print Screen button.
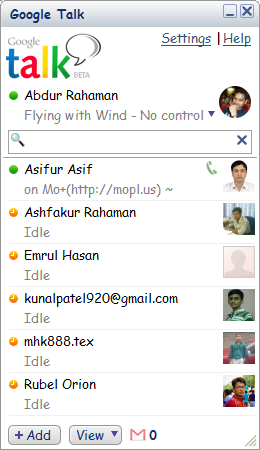
Example - Ive just opened Google Talk. Then pressed Alt + Print Screen and then paste it in Phtoshop. Only the picture of Google Talk has been pasted there.
Windows + Print Screen
Almost do the same job as Print Screen. But this time you dont need to paste the image anywhere. If you press Windows + Print Screen button at the same time, your monitor will blink for a moment, the image of your full screen will be saved in your picture folder automatically.
Just go to My Computer > Then hit on the Pictures from Left Panel > Now you will get a folder named Screenshots > All pictures taken by Windows + Print Screen button will be saved here.
Related Posts
- Take Screenshot by Snipping Tool
- Capture Screen by Microsoft Word
Stay with Marks PC Solution to get more interesting IT topics!
Go to link download

Tuesday, September 27, 2016
The power of GNU screen
The power of GNU screen
Ever feel like the whole world knows something really useful except you? I went to a tech conference the other day and someone mentioned the screen command. Wow...like where have you been all my life?!
In a nutshell: screen allows you to start a long-running process and then "detach" and shut down your computer while the command continues to run on the server. Very cool. Heres a quickstart guide:
perform initial configuration by opening ~/.screenrc and add the following:
# enable shell in screenin terminal, verify screen is installed:
shell -$SHELL
# turn off flash notification
vbell off
# clear terminal when exit editor or screen
altscreen on
# set title
termcapinfo xterm*|rxvt*|kterm*|Eterm* hs_ts=E]0;:fs=07:ds=E]0;07
hardstatus string "%h"
hardstatus off
# set footer
caption always "%{= kw} %=%-w%{= bk}%50>%n %t%{-}%+w%<"
screen -vin terminal, open a new session
screenin screen (has purple box in footer), create new session
Ctrl+a cin screen, switch to another session (where # refers to the session number 0, 1, 2, etc.)
Ctrl+a #in screen, switch to next running session (use p for previous)
Ctrl+a nin screen, list the running sessions
Ctrl+a "in screen, detach from the current session
Ctrl+a din terminal, list the running sessions
screen -lsin terminal, resume a running session
screen -r #####
P.S. You can change your hardstatus string value to a variety of things to display in your terminal title. However, adding the user name is tricky. If you use %h you get the default prompt, which likely contains some variation of user@domain, but if you want to create a custom title (say, server name ~ user name), then things get a bit harder. Most guides will tell you to include ${USER} in your string, which does in fact work...unless you sudo su to a different user account. Argh! - it still shows your original login username! To fix this, add the following to each accounts ~/.bashrc or ~/.bash_profile file (where the pink text is your custom title):
if [ "$TERM" = "screen" ] ; then PS1=$PS1"[e]0;${HOSTNAME%%.*} ~ ${USER}a]" ; fi
P.P.S. A popular alternative to screen is tmux
Go to link download
Monday, September 19, 2016
How to remove screen lock or pattern lock and hard reset android phone
How to remove screen lock or pattern lock and hard reset android phone
Every android phone has screen lock or pattern lock some time may be block this lock.when block screen lock or pattern lock then need to remove this lock.Now I showing tricks of how to remove screen lock, pattern lock, or hard reset.There are have some method for remove screen lock and hard reset.Now I discuss about those method.

Method number 1 #
press and hold "V+ and power button" together some second.After some second you will see factory mood on your phone screen as like as step-2 picture next select wipe data / factory reset using v+ or v- button and press ok button.Your phone will be restart.

Step-2

Method number 2 #
- At first Switch off your phone.
- Press and hold volume up + call button and + power button, while still holding before showing android logo then wait some time.After that
- If you see recovery menu / factory menu then go to step 5
- If you dont see recovery menu / factory menu then press home button or left key or call button then you will see.When you see recovery menu / factory menu then go to step 5
- Select Wipe data/Factory and press ok button
- Then select delete all data and press ok button then your phone will be restart and take several minute.
Method number 3 #
When the phone is powered off, press and hold the Volume Up button and the Volume Down button keys both at the same time, then press and hold the Power key until a test screen that shows some available options appears, usually takes about 15-20 seconds. When that screen pops up you can let go of the keys.
Press the Volume Down key to navigate down through the options until it highlights FACTORY RESET then press thePower key to select it.
Method number 4 #
Power the phone off all the way, press and hold the Volume Down button and press than release the Power button, still holding the volume down button for about 10-15 seconds. When you see some additional options pop up on the screen you can let go of the keys.
Press the Volume Down button select the options until it highlights the reset option; it usually says FACTORY RESET, then press the Power key to make the selection.
Method number 5 #

Method number 6 #

Method number 7#

Method number 8 #

Method number 9 #

Go to link download
Saturday, September 17, 2016
how to get out of align screen in omnia i900
how to get out of align screen in omnia i900

,yes i know, this maybe a hardware problem, but if you want to get out of the "align screen" loop on your omnia i900 after you perform a hard reset, this is how did it...
1. you must have active sync installed in your pc.
2. now power-off your phone.
3. connect your usb cable to phone and pc, then power on your mobile.
4. your mobile now will be detected and active synce will activated.
5. this is the important part, open notepad and leave the contents blank.
6. save it as "welcome.not" (without quotes and not as txt file).
7. go to active sync and click explore.
8. copy welcome.not to the mobile main memory.
9. restart phone.
thats it.. you will get past the "align screen".
hope it helps.
credits to samsung-omnia.org, modaco.com
Go to link download
Wednesday, September 14, 2016
Get Start Screen Back in Windows 10
Get Start Screen Back in Windows 10

Windows 8 came with a really smart look. But due to the negative feedback, the latest version of Windows (Windows 10) has come with traditional Start Menu. And to be honest, I can hardly find any change in Windows 10 which I can appreciate.
Applies to - Windows 10 Technical Preview.
Combination of Start Menu & Tiles
It looks really frustrating. To be honest its not worth of including here. In this combination, I cant work comfortably. And I guess most of the users have already adjusted with Windows 8 Start Screen. So it was not necessary to change this feature in Windows 10. Windows 8 lovers will hardly appreciate the new look!

Anyway, if you are comfortable with Start Screen and wanna get it back, there is no problem at all. You can easily switch between Start Menu and Start Screen. Simply follow the steps below:

- Right Click on your taskbar and select Properties.
- Go to the Start Menu tab.
- At the top, you will find this option marked - Use the Start Menu instead of the Start Screen.
- Simply click on the checkbox and unmark this option.
- Hit on Apply > OK and get your smart Start Screen back!

Installing .Net Framework 3.5 in Windows 10
.Net Framework 3.5 is missing by default as it was in Windows 8 and 8.1. And it causes problems while running those software which require this feature. Dont worry. You can install .Net Framework 3.5 following the same instruction as it was in Windows 8. Simply follow this method.
Stay with Marks PC Solution to get more interesting IT topics!
Go to link download
Sunday, September 4, 2016
Shake your Phone to Capture Screen!!!
Shake your Phone to Capture Screen!!!
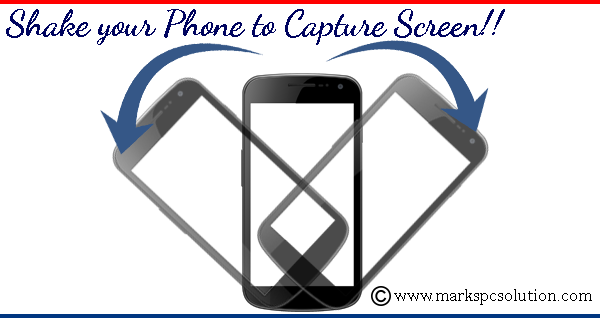
Well I think not many Android users are familiar with this exciting feature. And Im not talking about any third party app. Actually shake screenshot feature was not available in the previous versions of Android. Its really a comfortable way to capture your screen on the go!
Very often we need screenshot to save or share something. Sometimes you may need to save a conversation window as an evidence. And most of the time I need to capture my phone screen to make tutorial. Whatever it is, screenshot is essential for us.
Traditional System
Traditionally, you can capture your phone screen with the help of power button.
- Long Press the Power Button > A new Window appears > Choose Screen Capture.
- To capture a particular area, choose Partial Screenshot > Select your desired area > Save.
Limitations
- Requires at least few seconds to capture the screen. And sometimes you may not have that much time.
- If youre thinking about capturing the window that appears after long pressing the power button, you can never do it! Cause, if you press the power button one more time, that window will disappear.
Shake Screenshot - A smart way to capture . . .
Its been added as a new feature in the accessibility option of your Android Phone. Ive discovered this feature on Android 5 Lolli
When you need to capture a screen that appears for a short time (i.e. 1/2 seconds) then you must use this shake screenshot feature to capture it.
Enable Shake Screenshot
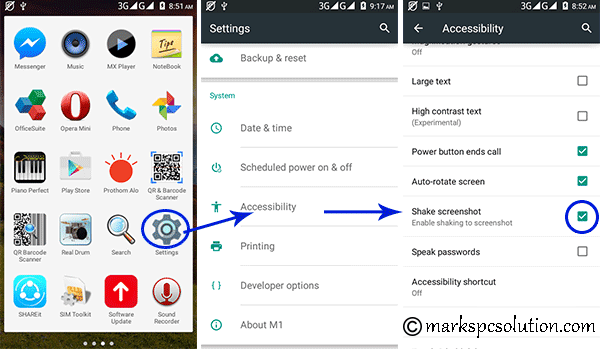
- From the home screen, tap on the Apps button.
- Find and tap on the Settings button.
- Scroll down > Tap on the Accessibility option.
- Mark the option - Shake Screenshot.
- Press the Home button to back to the Home screen. Thats it.
Lets test the new settings!
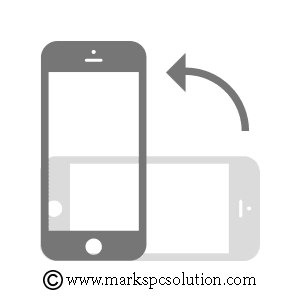
- Quickly rotate/shake your phone clockwise or anticlockwise.
- If the settings is okay, you will hear a click sound and a snapshot will be captured.
- Now get your captured screen from your Screenshots folder.
Screenshot Location
Screenshot location may vary depending on your phone. I use Symphony M1. Operating system is Android 5.0 Lolli
My default write disk is SD Card. I collect the screenshots as -
File Manager > SD Card > Picture > Screenshots
If your default disk is phone storage, then screenshots might be saved on Phone Storage.
Hope all of you will enjoy todays tutorial. If you face any trouble, dont hesitate to knock . . .
Use Snipping Tool to Take Screenshot!
Stay with Marks PC Solution to get more interesting IT topics!
Go to link download
Saturday, August 27, 2016
Download oCam Screen Recorder Version 231 0
Download oCam Screen Recorder Version 231 0
 |
| oCam (Screen Recorder) |
Whats New :
* Open H.264 codec added
* AAC encoder performance improvements and add 512Kbps bitrate
* DirectX8 recording performance is improved
* Capture performance is improved(Game recording mode)
* Additional options that margin when output watermark
* Fixed a crash related to OpenGL GDI leak
* Fix problems stopping the game in certain situations* Modifying the language packs related security issues
Features of product :
Avira Anti-Virus is detecting oCam(Deep Screen) as a false positive, do not worry.
* Completely 100% FREE Software
* Computer screen, game, video, audio recording is possible.
* Pause/resume of recording function.
* Recording using the built-in video codecs(AVI, GIF, MP4, MKV, NVIDIA NVENC H.264, M4V, FLAC, FLV, MOV, WMV, TS, VOB).
* Recording using the built-in audio codecs(MP3, AAC, FLAC) and real-time audio encoding.
* Can record you use the external VFW codec.
* Have large video formats to support more than 4GB.
* Recording sound from your computer as you can.
* Audio recording is made possible without the stereo mix setting.(Windows 7, Vista SP1 or later)
* A variety of sound quality when recording can be selected.
* Screen capture is possible. Image Format(JPEG, GIF, PNG, BMP)
* Recording area of the keyboard can be easily controlled.
* Can record the full screen and window area.
* During recording, the mouse cursor can be set to be included.
* Bug reporting is available to developers.
* Record the results can be stored in a specific folder, you have the option.
* oCam dual-monitor support.
* Flash in the IE browser, the target area can be selected.
* Preferences from the FPS setting is possible.
* Recording schedule function is available.
Download Click Here
Go to link download
Thursday, August 25, 2016
How to Disable Windows 8 Lock Screen
How to Disable Windows 8 Lock Screen
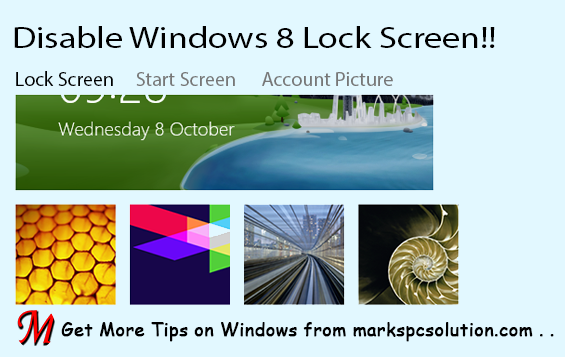
Lock screen looks cool when youre in a tablet PC. But if youre a busy person with laptop or desktop computer, probably it will make you bore. Same thing happens to me. Thats why Im gonna write about how to disable lock screen in Windows 8.
Applies to:
- Windows 8/ 8.1
- Windows RT
- Windows Server 2012
You can easily disable the lock screen from Group Policy Editor (gpedit.msc). Once disabled, the lock screen will not be shown when you start up your Windows! And certainly this will save you few seconds.
Instruction
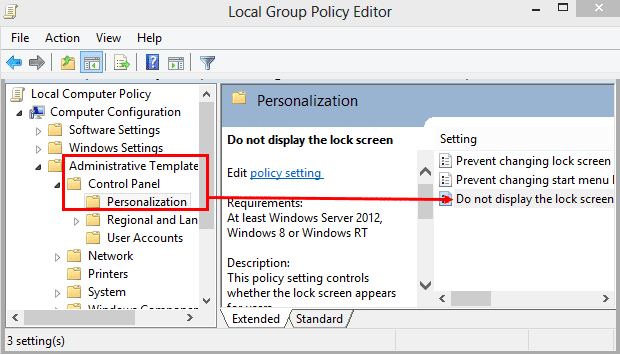
- Press Start + R to open Run.
- Type gpedit.msc and hit Enter.
- Collapse Administrative Templates under Computer Configuration.
- Collapse Control Panel and choose Personalization.
- Click twice on Do not display the lock screen.
- Select Enabled > Apply > OK. Done!

If youd like to get your lock screen back, simply follow the above steps again. And at the last step choose Not Configured or Disabled option to get it back.
If you face any problem regarding lock screen, dont hesitate to leave a comment . . .
If you face any problem regarding lock screen, dont hesitate to leave a comment . . .
Stay with Marks PC Solution to get more interesting IT topics!
Go to link download
Thursday, August 18, 2016
Black screen on Google Maps
Black screen on Google Maps
A recent update to Google Maps caused my screen to black out with a WebGL error:

Fortunately, the solution was pretty easy: load Google Maps in Lite Mode (source)
Go to link download
Subscribe to:
Posts (Atom)