Showing posts with label custom. Show all posts
Showing posts with label custom. Show all posts
Thursday, October 6, 2016
Creating Custom Brush in Illustrator
Creating Custom Brush in Illustrator

Adobe Illustrator can be compared to a programming tool in that sense, it provides a lots of ways to customize your graphics works. It provides so many designing options which you hardly get in other graphics tools. In this lesson, you will learn how to create amazing brushes within few minutes!
Today Im gonna talk about how to create custom brushes - Scatter Brush, Art Brush & Pattern Brush. After creating these brushes, you can use them as borders for different shapes such as triangle or oval etc.
Note: This tutorial applies to all versions of Adobe Photoshop. However Ive prepared this tutorial using Illustrator CS6.
Okay lets start -

Run Adobe Illustrator from your PC. Now look at the tools panel and find the Paintbrush Tool (See the image on the left). I will create two little objects with this tool which later will be used to create awesome brushes.
Go to the File Menu > New > Create a new document of any size.
Hit on the Paintbrush Tool and draw an object (I sketched something like a leaf) as shown in the image below.

- Now select it through selection tool
- Press Alt key and drag it to create a copy of it.
- Now select the second leaf again and rotate it, place it over the first leaf so that they look like attached.
- Again select the first leaf > Double click on Fill Color from the bottom of tools panel > Choose Red.
- Similarly, select the second leaf and choose green color for it.
- It should look like as below

Now the first but the difficult part has been completed. Now youre ready to have fun in the next step.
Creating Brushes
You will be able to create brushes from the above leaves. First, make sure the brush window is open on your document. Or go to the Window menu and choose Brushes.
- Select both leaves through selection tool
- Go to the Brushes window and click on New Brush Icon (Look at the image below)

- Choose Scatter Brush > Rename it if necessary > Change the values of different fields if necessary > Hit OK
- Again choose New Brush (Leaves must be selected) > Choose Art Brush > You can change the size and direction > Hit OK
- Click on New Brush again > Choose Pattern Brush > Hit OK
- Now youve three custom brushes. Lets apply them :)
Applying the Brushes to Shapes
Before creating shapes, make sure your fill color is white. So that you can clearly understand the effects of different brushes.
Now choose Ellipse Tool (Oval) from the shape. Press Shift key and draw a circle. Now go to the brush window and Apply your newly create Art Brush. The circle will look like as below!

Create another circle. And this time you should test the pattern brush.

How is it? :)
In this way, you can also apply this trick to different shapes such as triangle, star, rectangle etc.
Here Ive just illustrated a simple example of customizing the brush. In this system, you can create numerous brush designs. And can you imagine how much designing options are available in whole illustrator? Simply Ive no idea. There could be millions!!!
It takes my whole evening to prepare this tutorial. Please inform me whether you like it or not. :)
Stay with Marks PC Solution to get more interesting IT topics!
Go to link download

Sunday, September 11, 2016
Download Classic Custom Cabinets 4 0 4 APK for Android
Download Classic Custom Cabinets 4 0 4 APK for Android
ID: com.app_classicss.layout
Version: 4.0.4
File Size: 6.1Mb
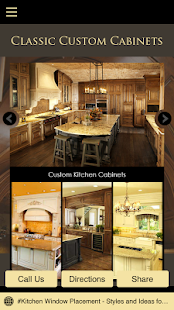
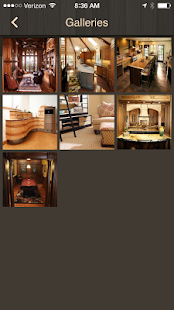
Classic Custom Cabinets Screenshots
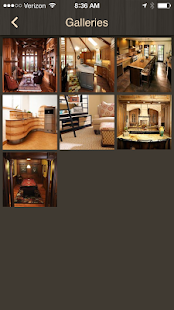
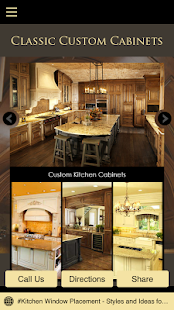

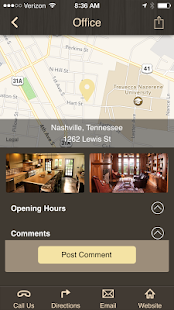
Classic Custom Cabinets Description
At Classic Custom Cabinetry our expert cabinet makers create fine wood and custom cabinets. Our reputation has given our team wide recognition as being the premier cabinet makers in Nashville, Middle Tennessee and beyond. Classic Custom Cabinetrys ability to complete each custom project ‘on time’ and with the absolute highest quality standards and craftsmanship is matched by our devotion to a personalized approach and attention to detail.From our cabinet shop in Nashville TN, we create custom cabinets for kitchens, baths, libraries, living rooms, pool rooms, home theaters and more for clients all over Tennessee and the neighboring states of Alabama, Kentucky and Arkansas. We work with contractors for new construction, remodeling or special woodworking projects. Our in house designer will also work with the client directly to design the perfect solutions for your cabinetry needs. Our team of craftsmen and cabinet makers ensure on time delivery of custom built cabinets and the highest quality standards. View our gallery for ideas and inspiration.
Download Classic Custom Cabinets 4.0.4 APK
Go to link download
Monday, August 15, 2016
Setting up Custom Domain for Blogger Blog
Setting up Custom Domain for Blogger Blog
Blogger allows you to run a blog at free of cost. Unlike WordPress, you can use all the features and benefits from blogger without spending a single dollar. But if you would like to use a custom domain for your blog, then you have to purchase it from a third party domain registrar.
Few years ago, blogger had its own domain registrar and the users could purchase a domain from blogger dashboard. And it was very easy for the users to set a custom domain that time. But later blogger stopped providing custom domain service. So, the bloggers who would like to use custom domain for the blogs, should purchase domains from third party.
Setting up Custom Domain
Well for the new users domain set up process is little bit complex. But if you go step by step, then it wouldnt be so difficult.
First, you need to purchase a custom domain (Choose a domain name and register it. Before that, make sure the domain is available) from a domain provider. As you know, there are numerous domain hosting sites available, you can choose one which you prefer. Here I can list some of them:
- GoDaddy (Marks PC Solution is currently using it)
- Bluehost
- EasyDNS
- Hover
- Namecheap
And there are many other domain service providers throughout the web. You can find them by search with the words - Domain Registrar or Domain Provider etc. And the registration charge and renewal varies with the provider. I guess, you have to pay $10 to $15 per year for the domain name only.
Next, youve to set up your domain with the site. Hope youve already purchased the domain. Now follow the steps below:
- Go to Blogger Dashboard > Settings > Basics
- Then move to the Publishing > Blog Address > Hit on the Edit button
- Now type the domain URL youve registered i.e. www.markspcsolution.com (you must begin the URL with www)

- Hit on the Save button. Now you will see an error and two CNAMEs listed below. The first CNAME is same for all - Name being "www" and Destination "ghs.google.com". And the second CNAME varies person to person. Its a security CNAME. Example - Short token - 2mdsgfwgqzh3. Long token - gv-brhg3pungts8u7.dv.googlehosted.com.
- Now go to your domain hosting providers site and find DNS (Domain Name System) settings from the dashboard.
- Enter the first CNAME as - www for name, label or host. And ghs.google.com for destination, target or points to.
- Enter the second CNAME similarly. Enter the short and long security token. Set the TTL to 1 hour.
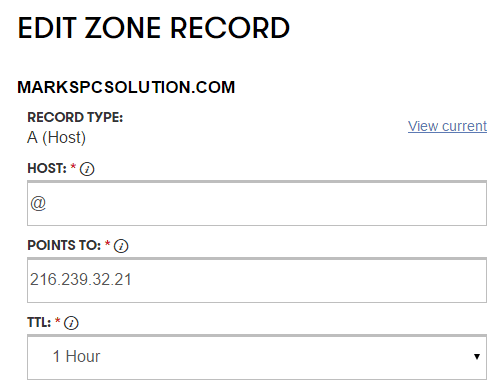
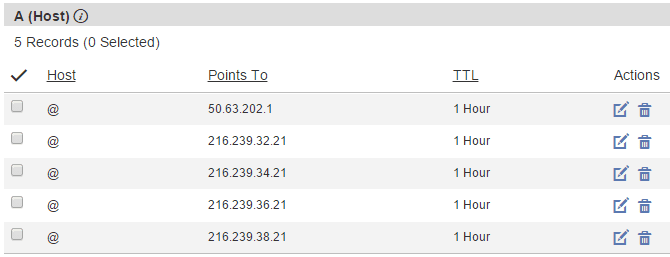
- For moving your naked domain to an actual site ( from markspcsolution.com to www.markspcsolution.com) you have to enter A records. Otherwise visitors may not access your site without using www.
- Now enter the domain name (i.e. markspcsolution.com) and list the IP addresses as shown in the "A" section. Youve to create 4 separate A records which point to 4 different Googld IPs:216.239.32.21216.239.34.21216.239.36.21216.239.38.21
- Now wait for about an hour to move to the final step. By this time your DNS settings will be activated.
- Again back to the blogger Settings > Basics > Publishing > Edit > Enter your custom domain URL > Hit Save. Thats it.
Wait wait wait! Dont be hurry. Dont be disappointed. It might take up to 24 hours to work properly. And then your blogspot site will be redirected to your custom domain.
If the custom domain doesnt work, there could be any problem in the settings. In that case, you can contact your domain registrar or take help from an expert.
You can also read bloggers support pages:
- How do I use a custom domain name for my blog?
- Create a CNAME record for my custom domain
Some Issues you should know regarding custom domain:
- All the backlinks you have with previous URL will no longer be counted.
- But you can still get visitors from old backlinks/ bookmarks as your previous URL will be redirected to the new URL.
- The link of all posts will be automatically converted to the new URL.
- Images youve used with the posts will be showing without any problem.
If you would like to know anything else, please knock me . . .
Stay with Marks PC Solution to get more interesting IT topics!
Go to link download
Subscribe to:
Posts (Atom)